Skip to content

Quick Start Guide

Before you begin: This system opens plate lids during imaging. The current installation in TSL PGC07 is for demonstration purposes only and is not suitable for live culture use. Organisms subject to containment requirements — including Magnaporthe cultures under a plant health licence — must not be used with this system until it is relocated to an appropriate facility. Confirm suitability with your supervisor before proceeding.


1. What you need

ItemDetail
Laptop MacBook or similar with a USB-C port and a web browser
USB drive For copying images off the Automator (exFAT, FAT32, or NTFS)
Login credentials Username: admin    Password: tsl

2. Location

TSL PGC07 growth chamber

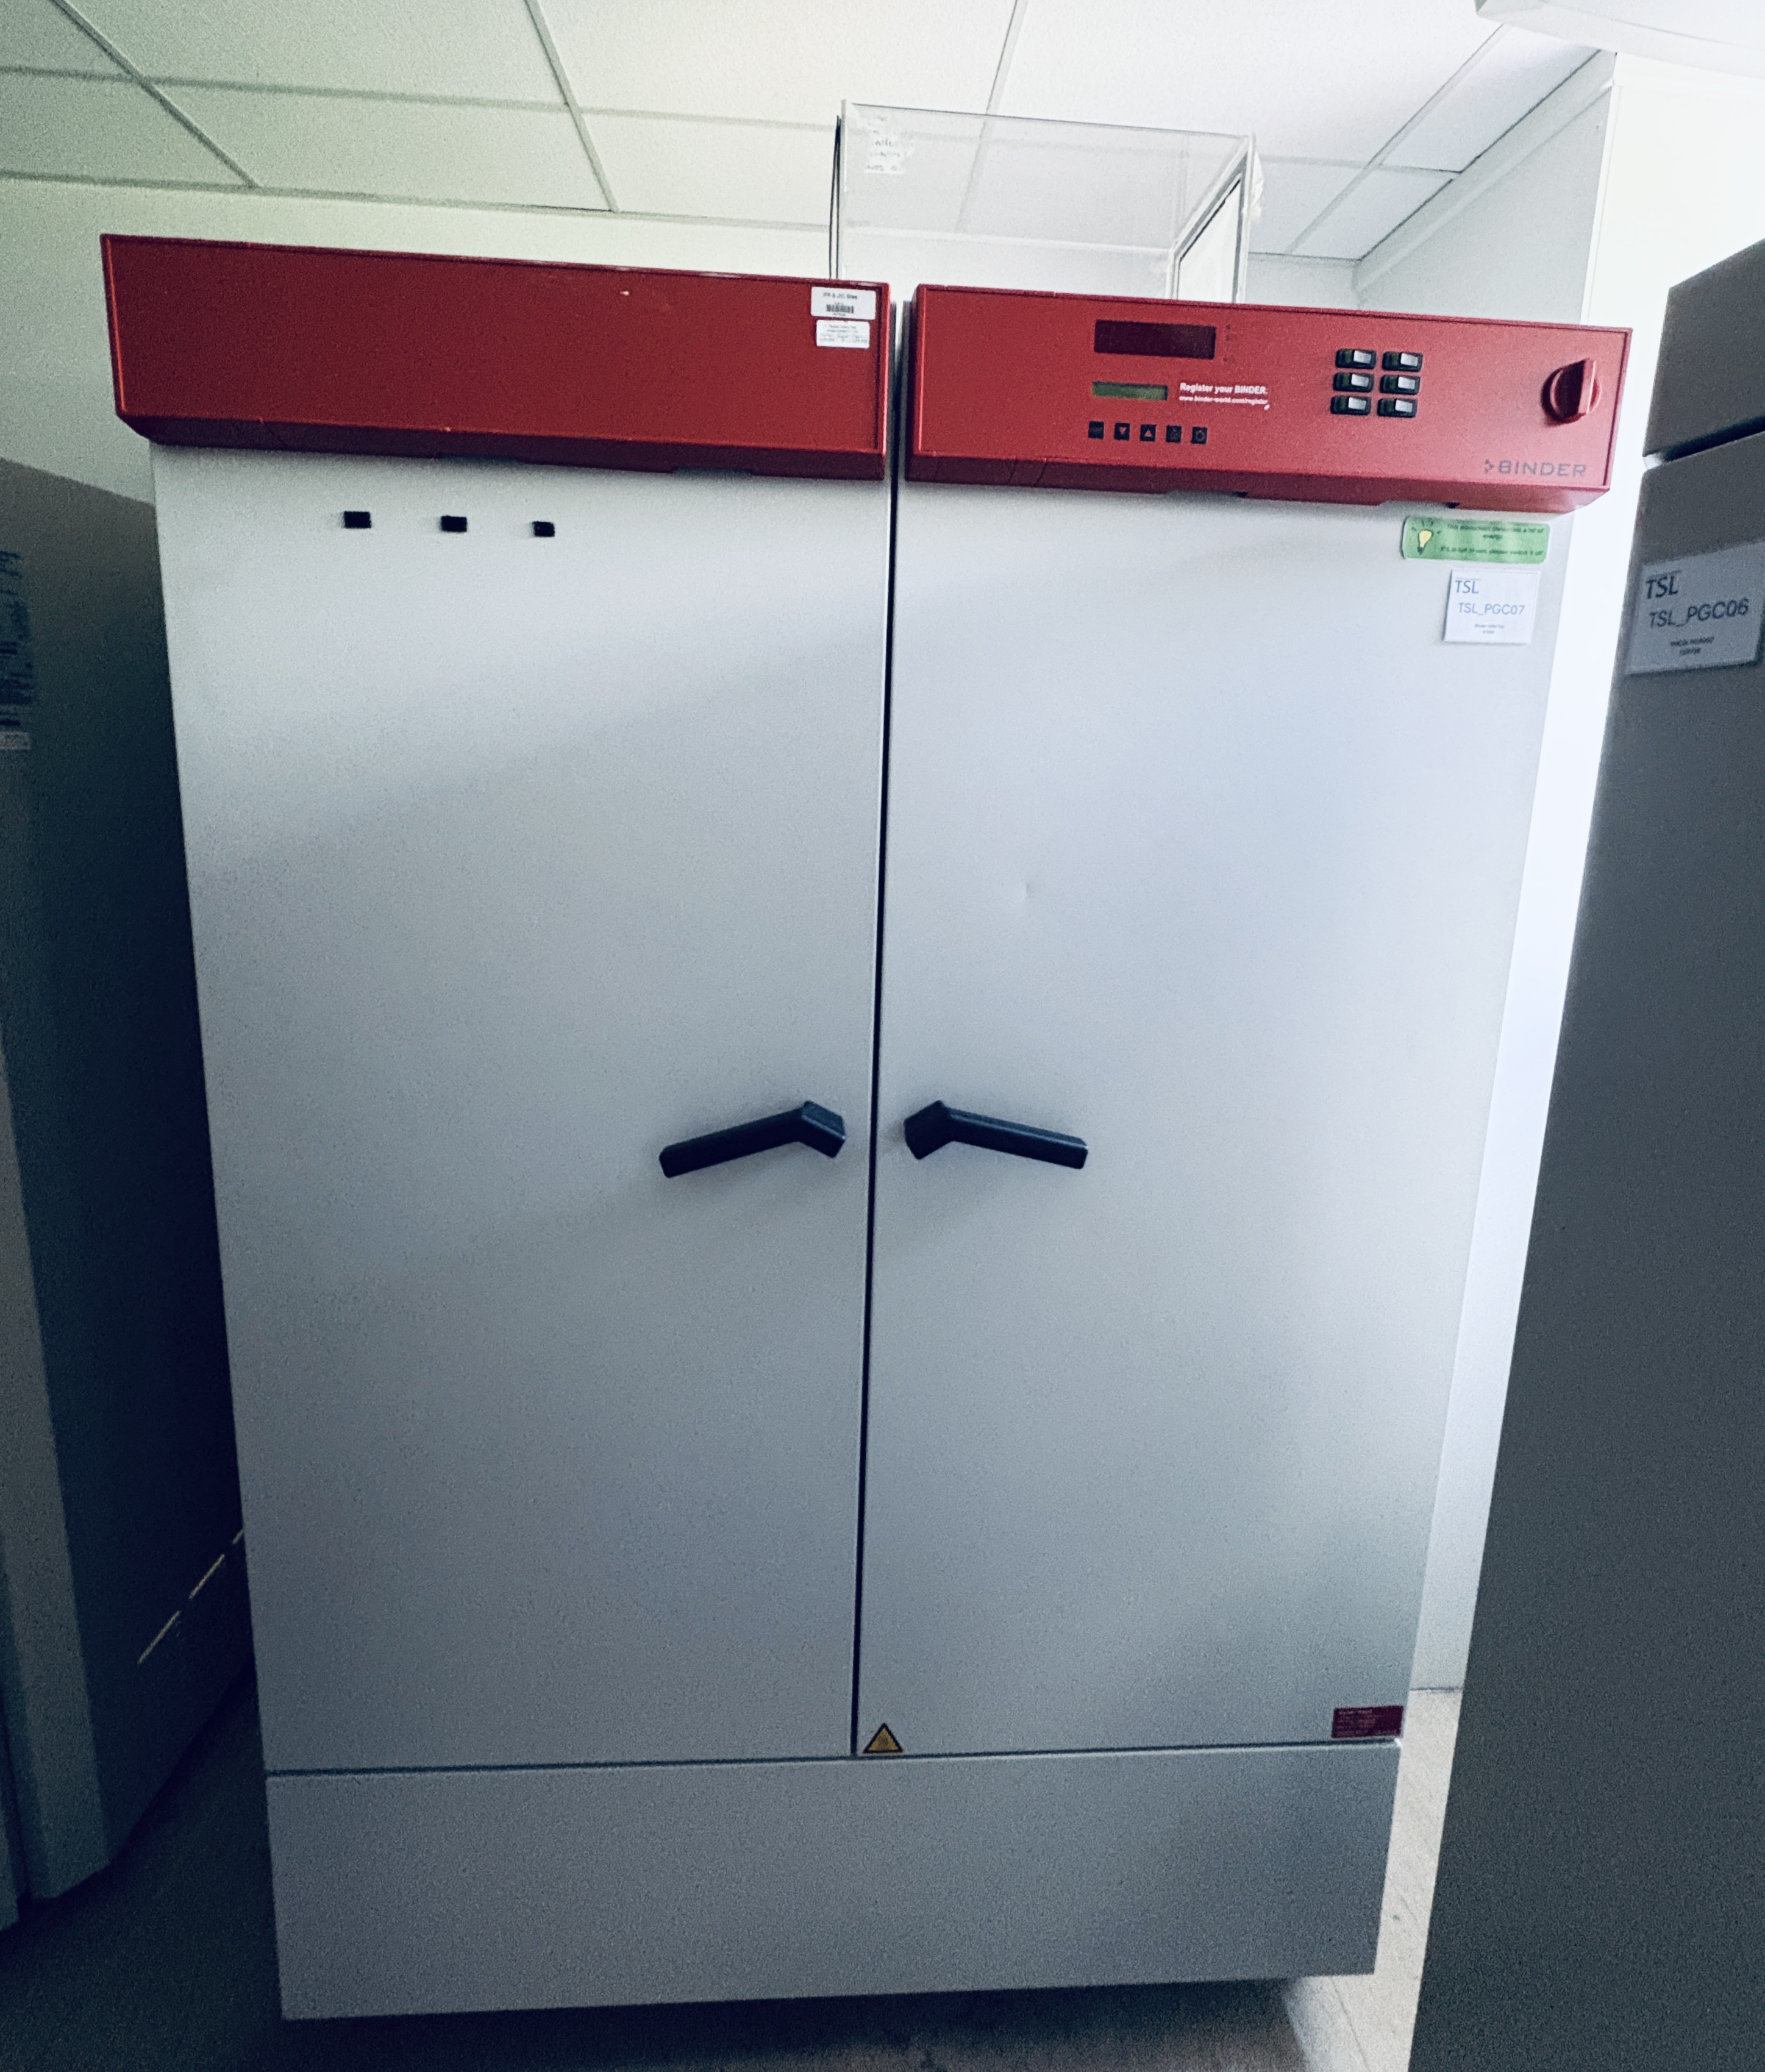
TSL PGC07 — BINDER growth chamber, Growth Room
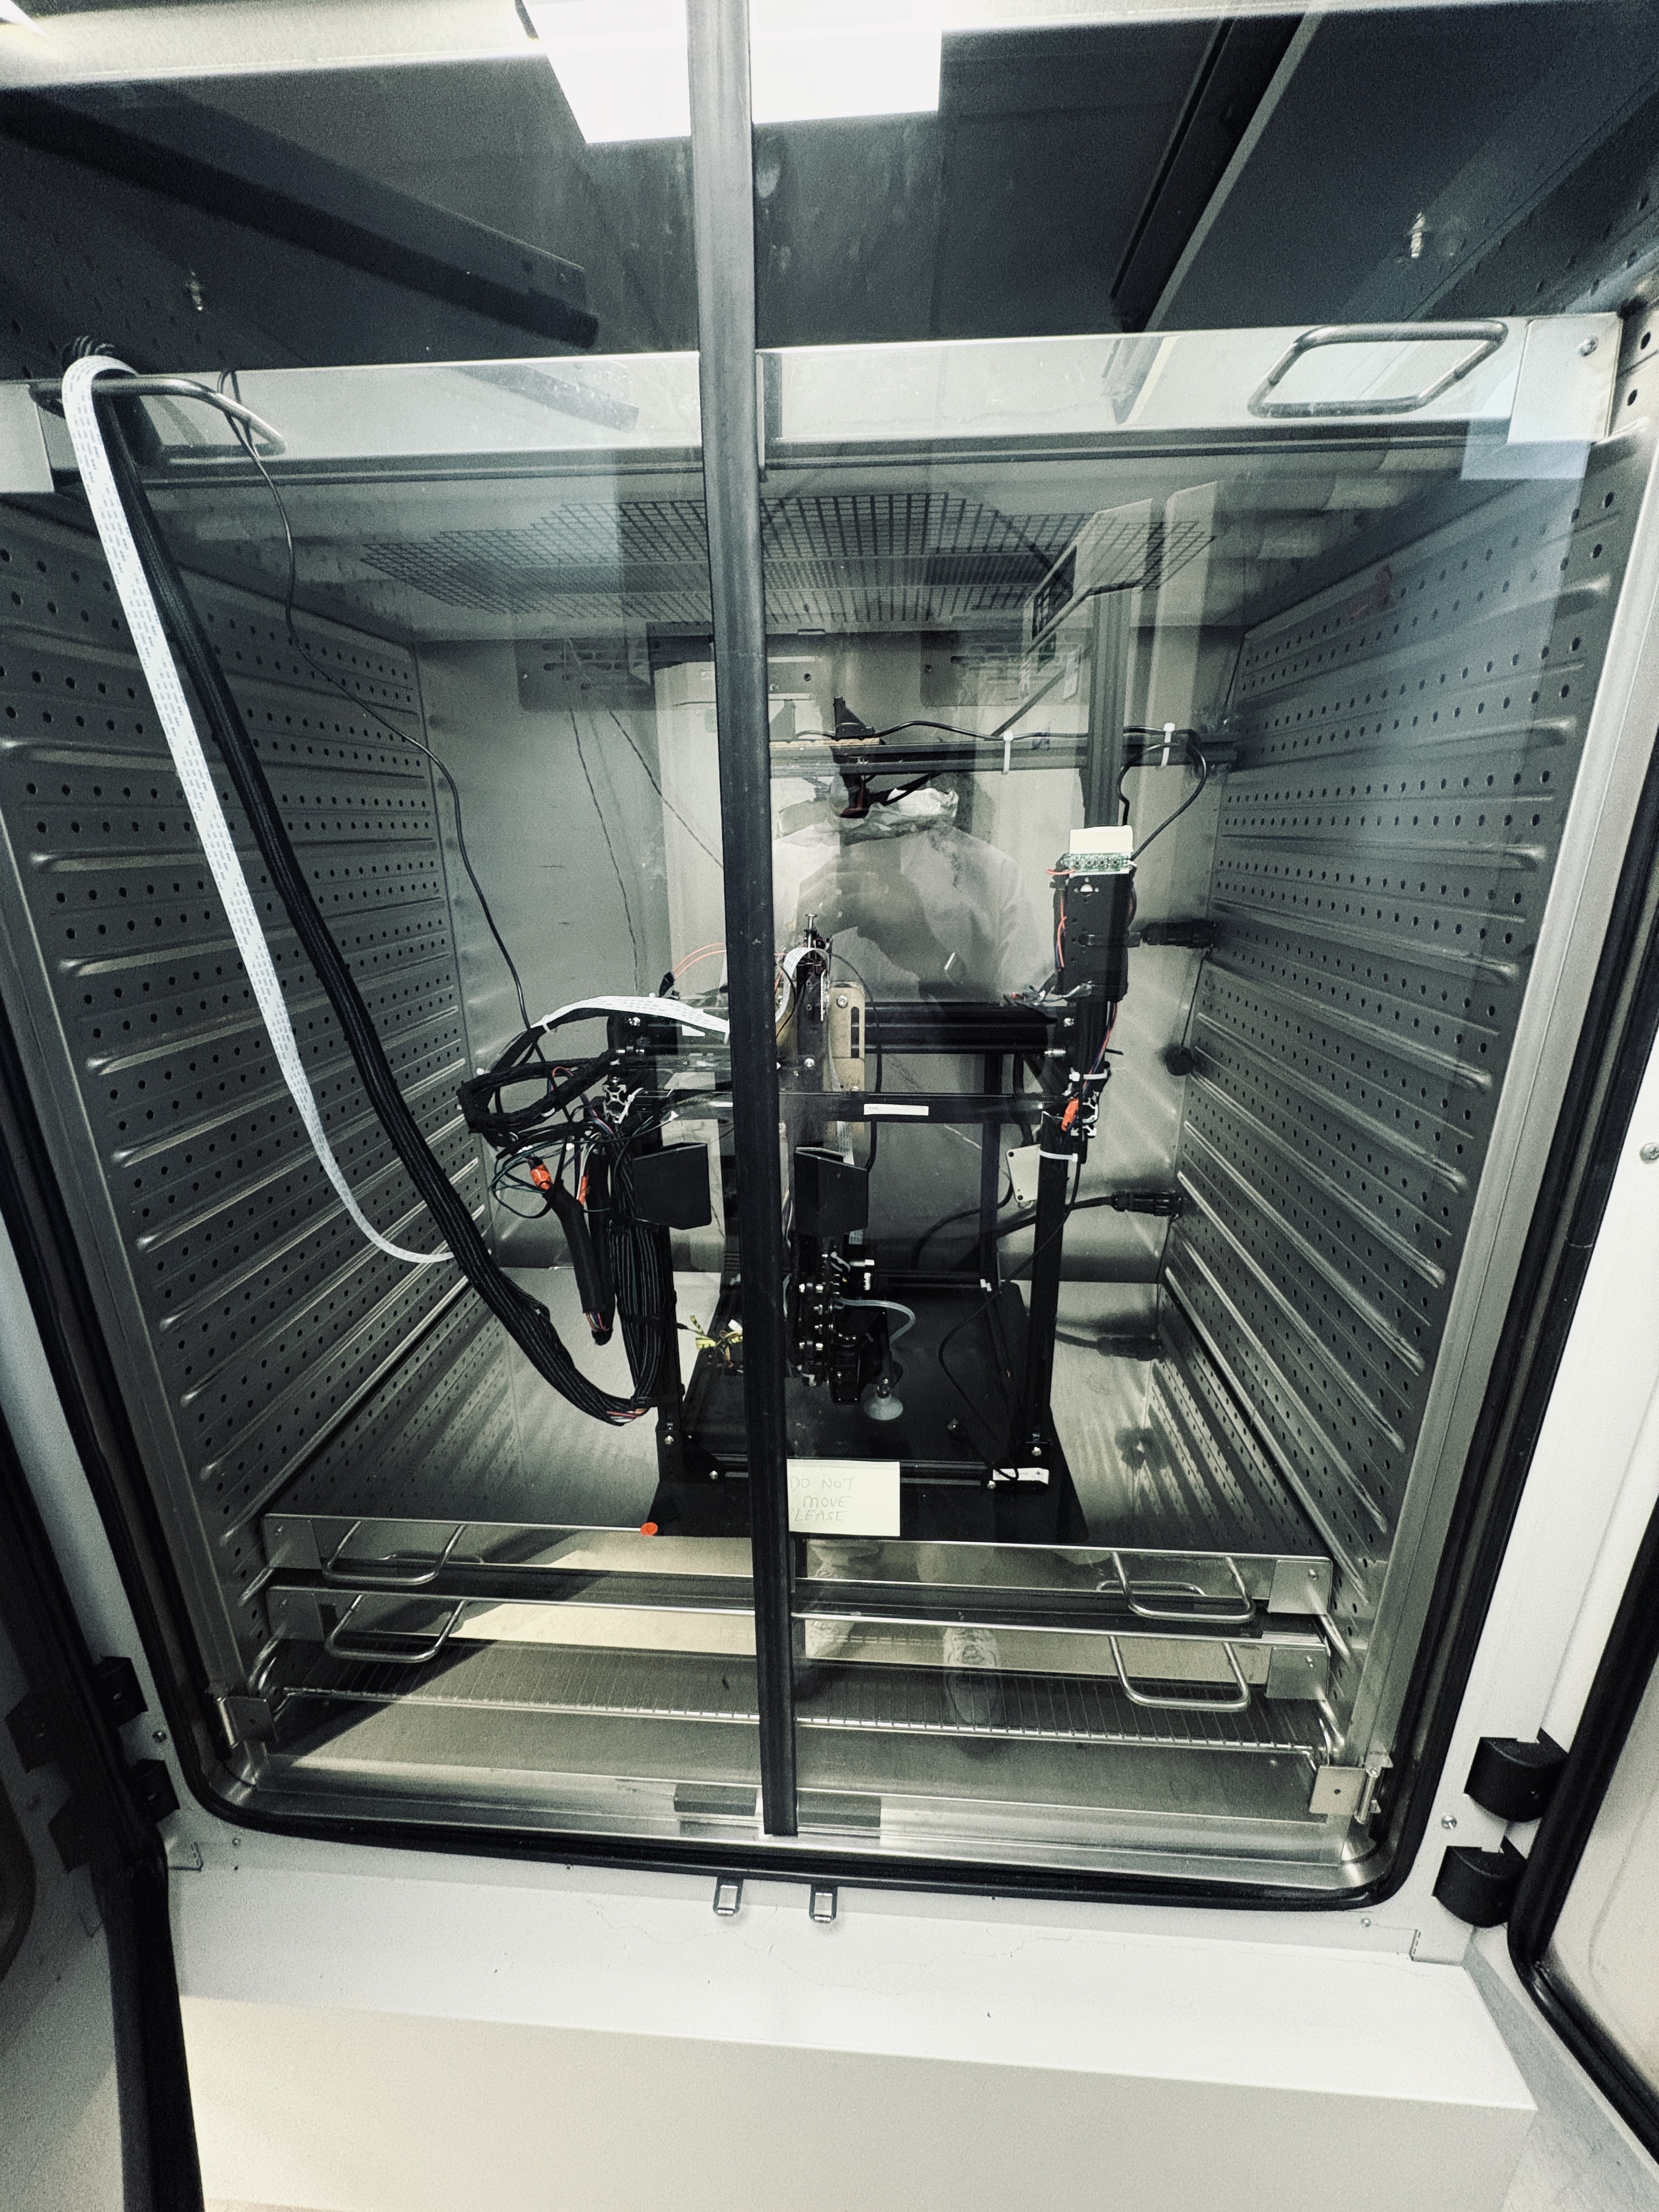
Automator inside growth chamber

Automator inside TSL PGC07, door open

The Automator is located inside TSL PGC07, a BINDER growth chamber in the Growth Room on the TSL Building Ground Floor, at the end of the room nearest the window.


3. Getting started

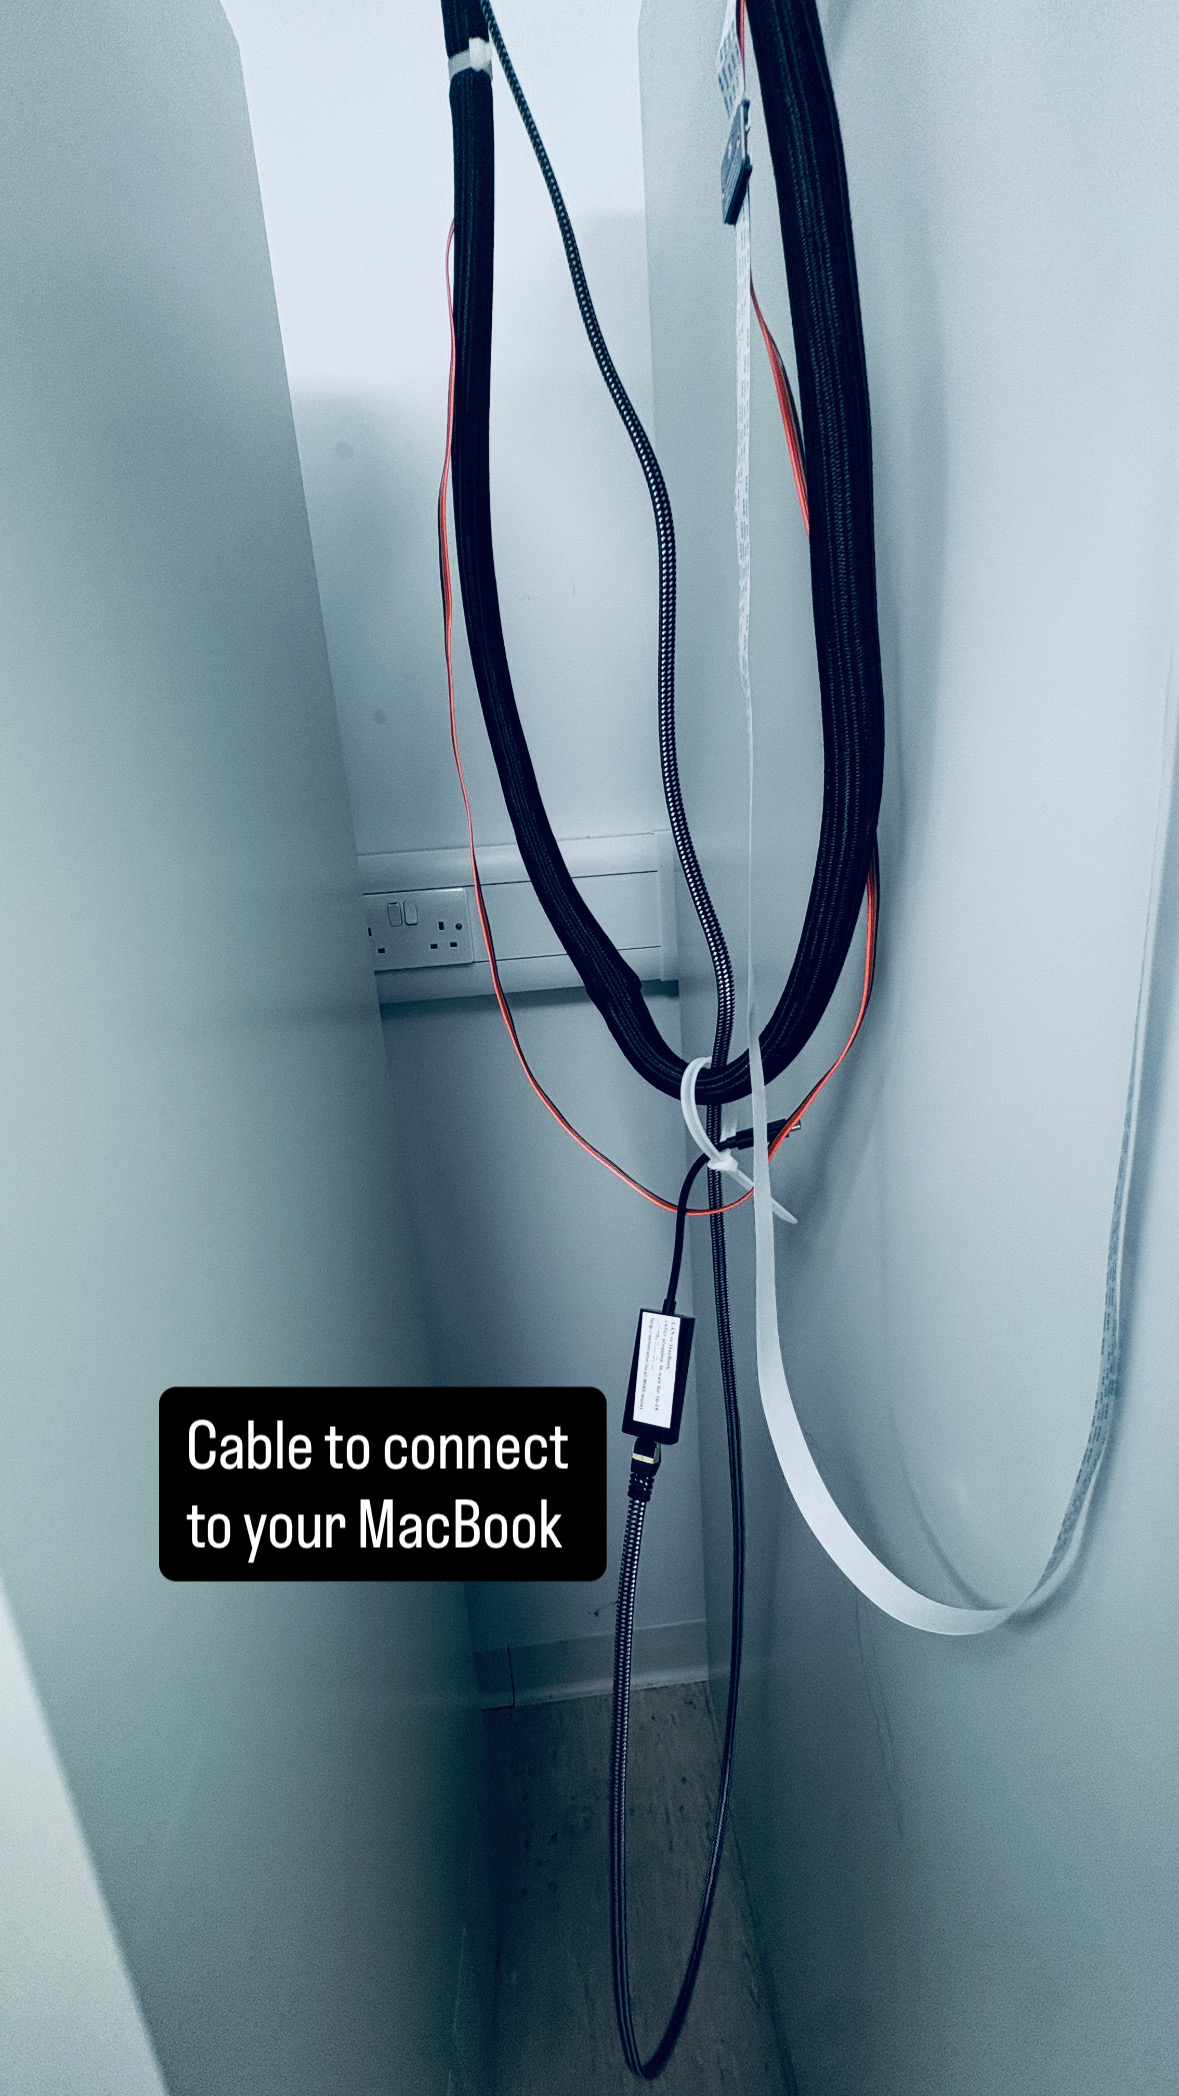
Ethernet cable beside TSL PGC07

Ethernet cable hanging beside TSL PGC07
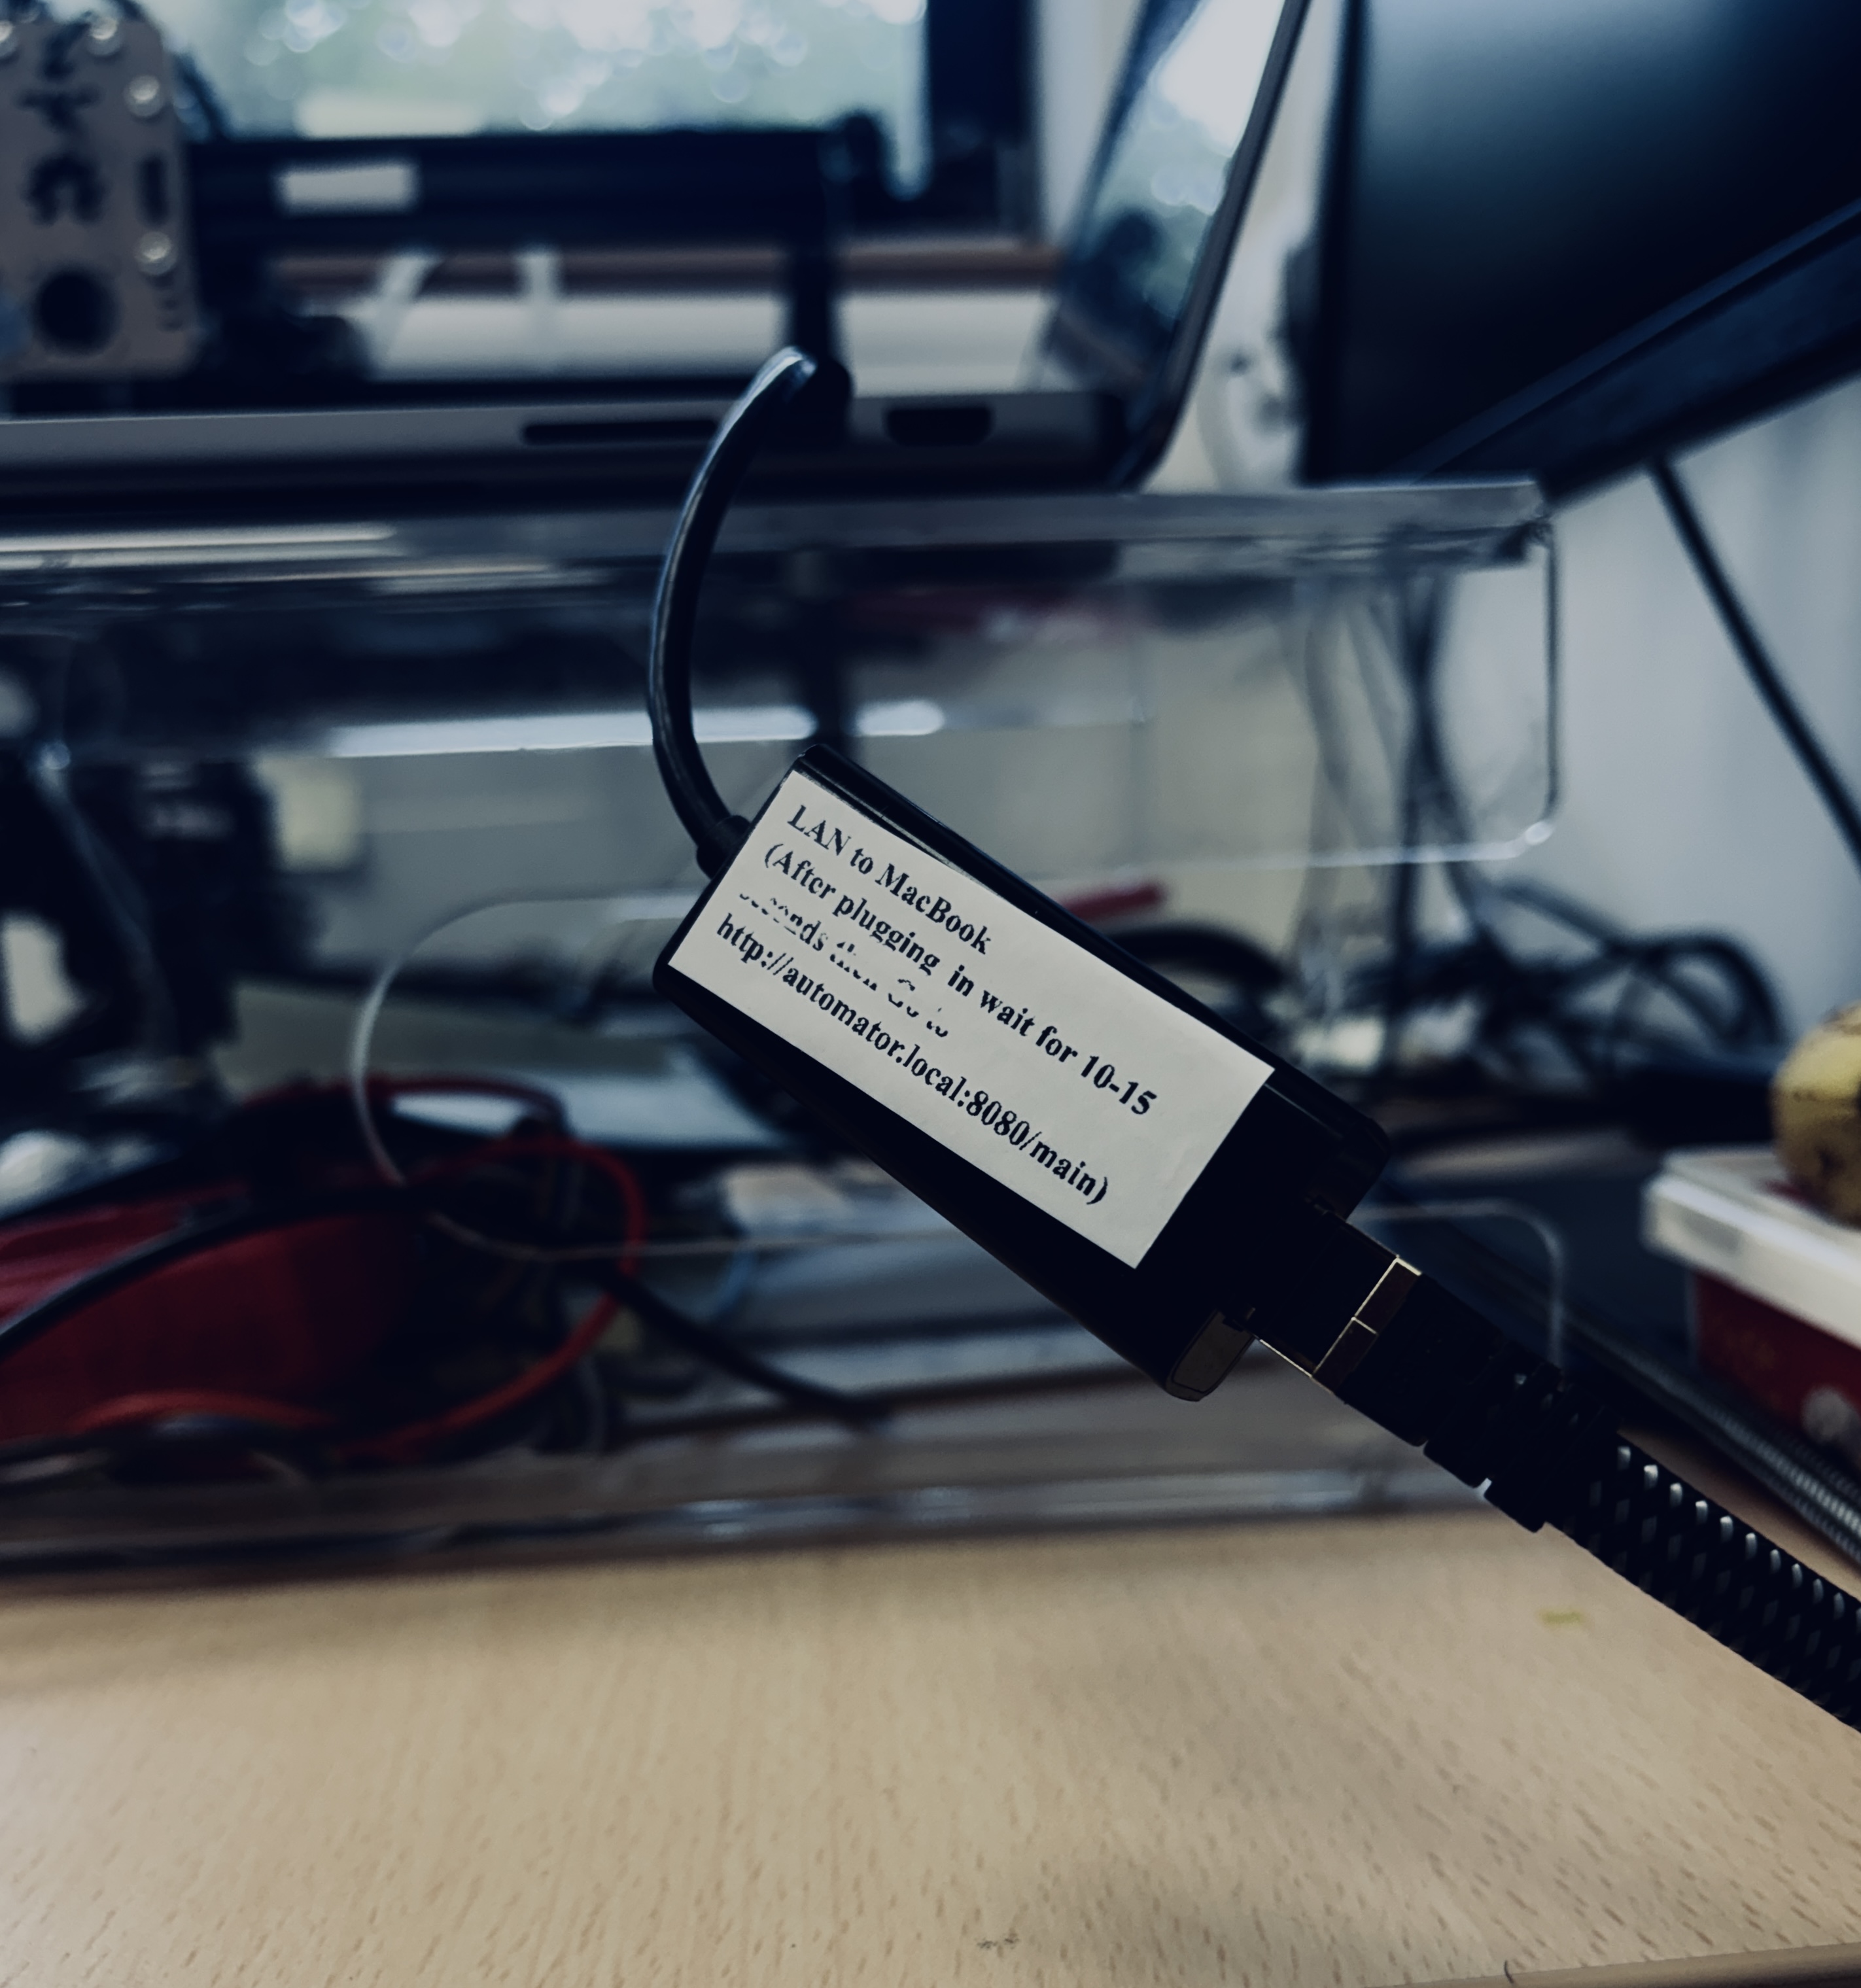
USB-C to Ethernet adapter on MacBook

USB-C to Ethernet adapter connected to MacBook
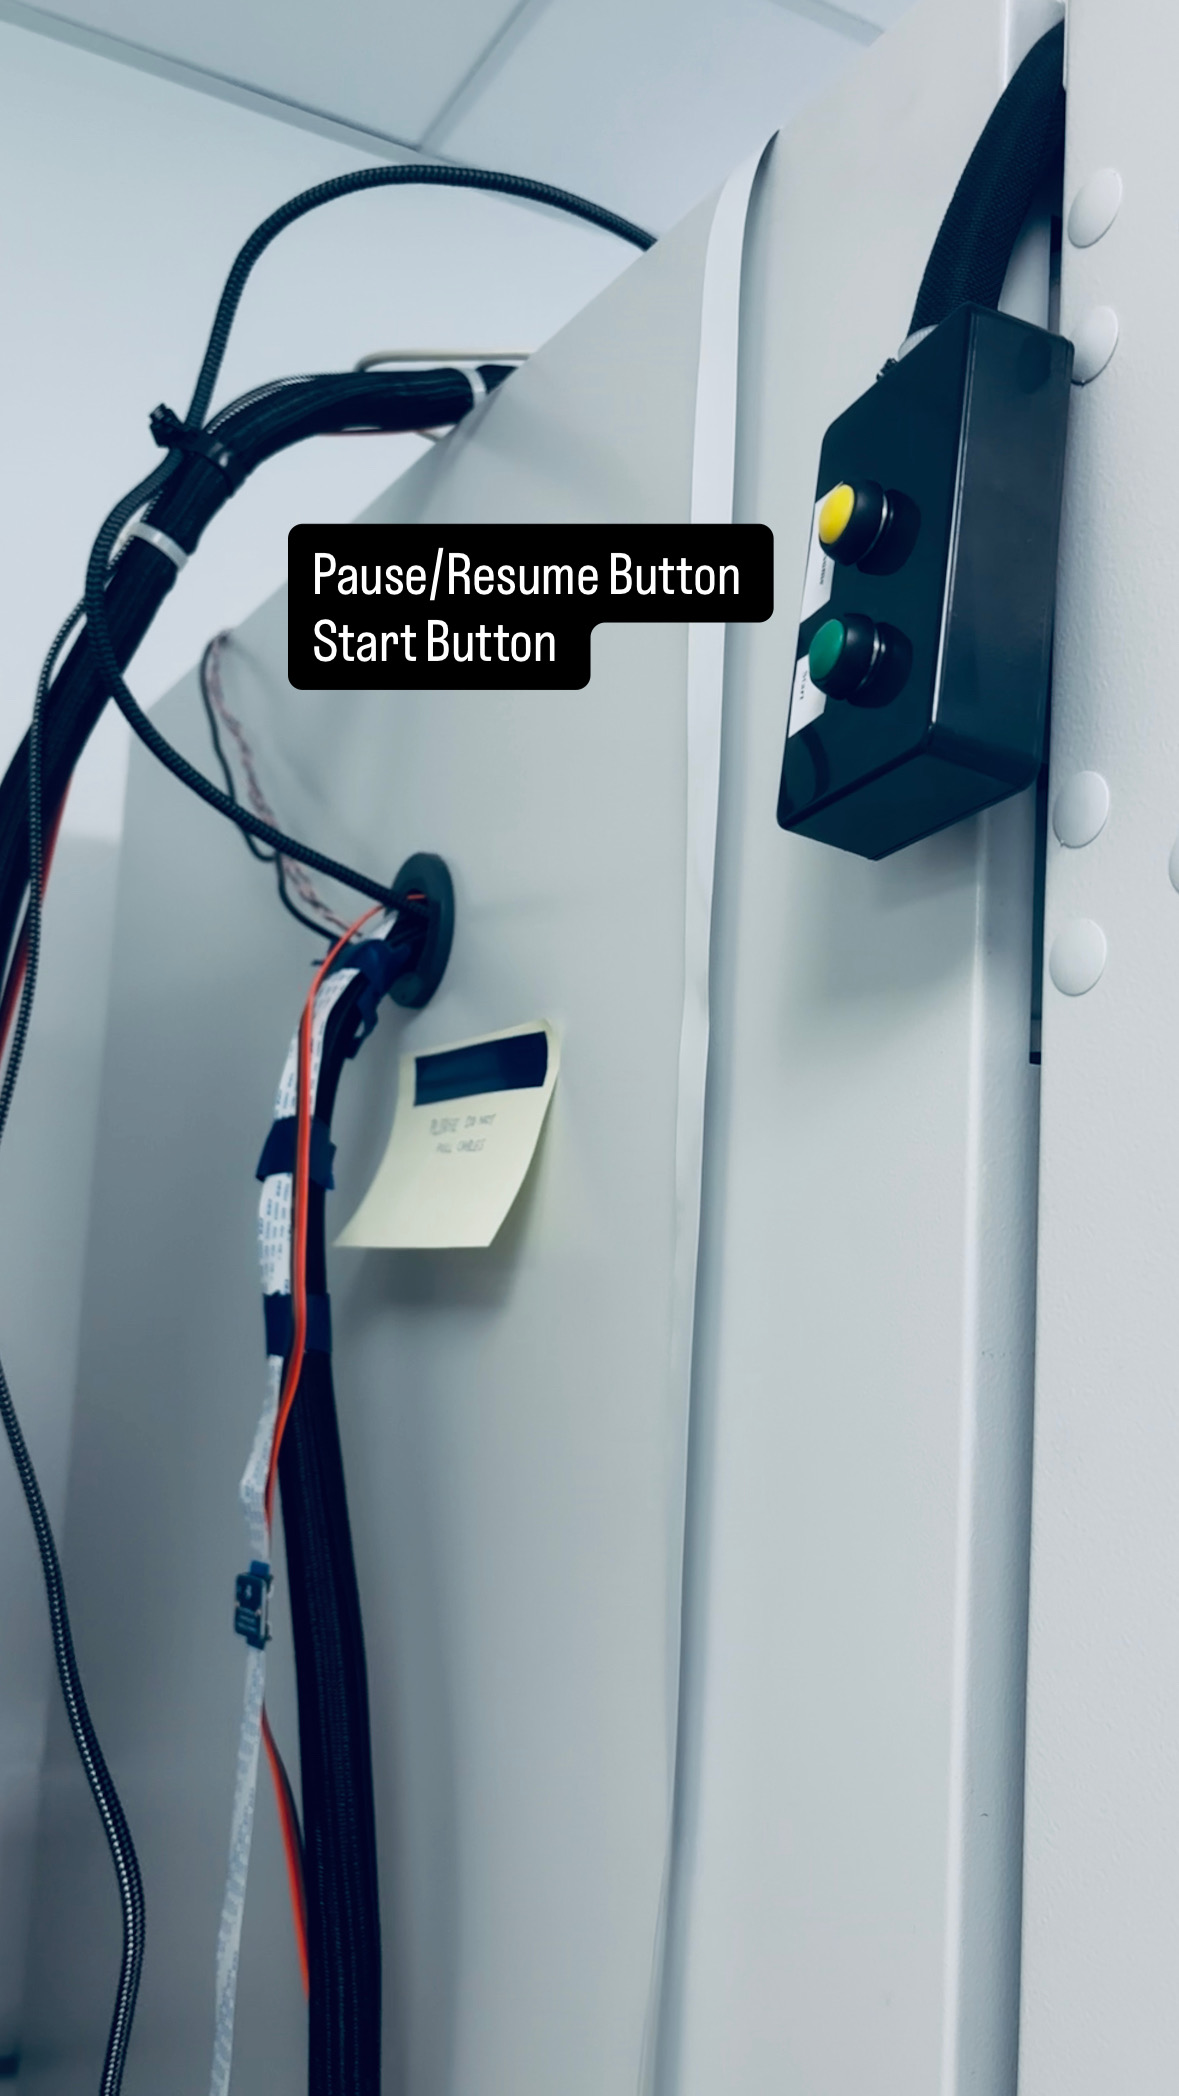
START button location beside TSL PGC07

START button location beside TSL PGC07

Connect and start

  1. Take the Ethernet cable hanging on the wall beside TSL PGC07 (labelled Cable to connect to your MacBook).
  2. Plug a USB-C to Ethernet adapter into your MacBook.
  3. Connect the cable into the adapter. Wait ~15 seconds for the network to establish.
  4. Press the green START button on the wall beside TSL PGC07.
  5. Open http://automator.local:8080/ in your browser.
    Fallback: http://192.168.50.2:8080/
  6. Log in: username admin, password tsl.
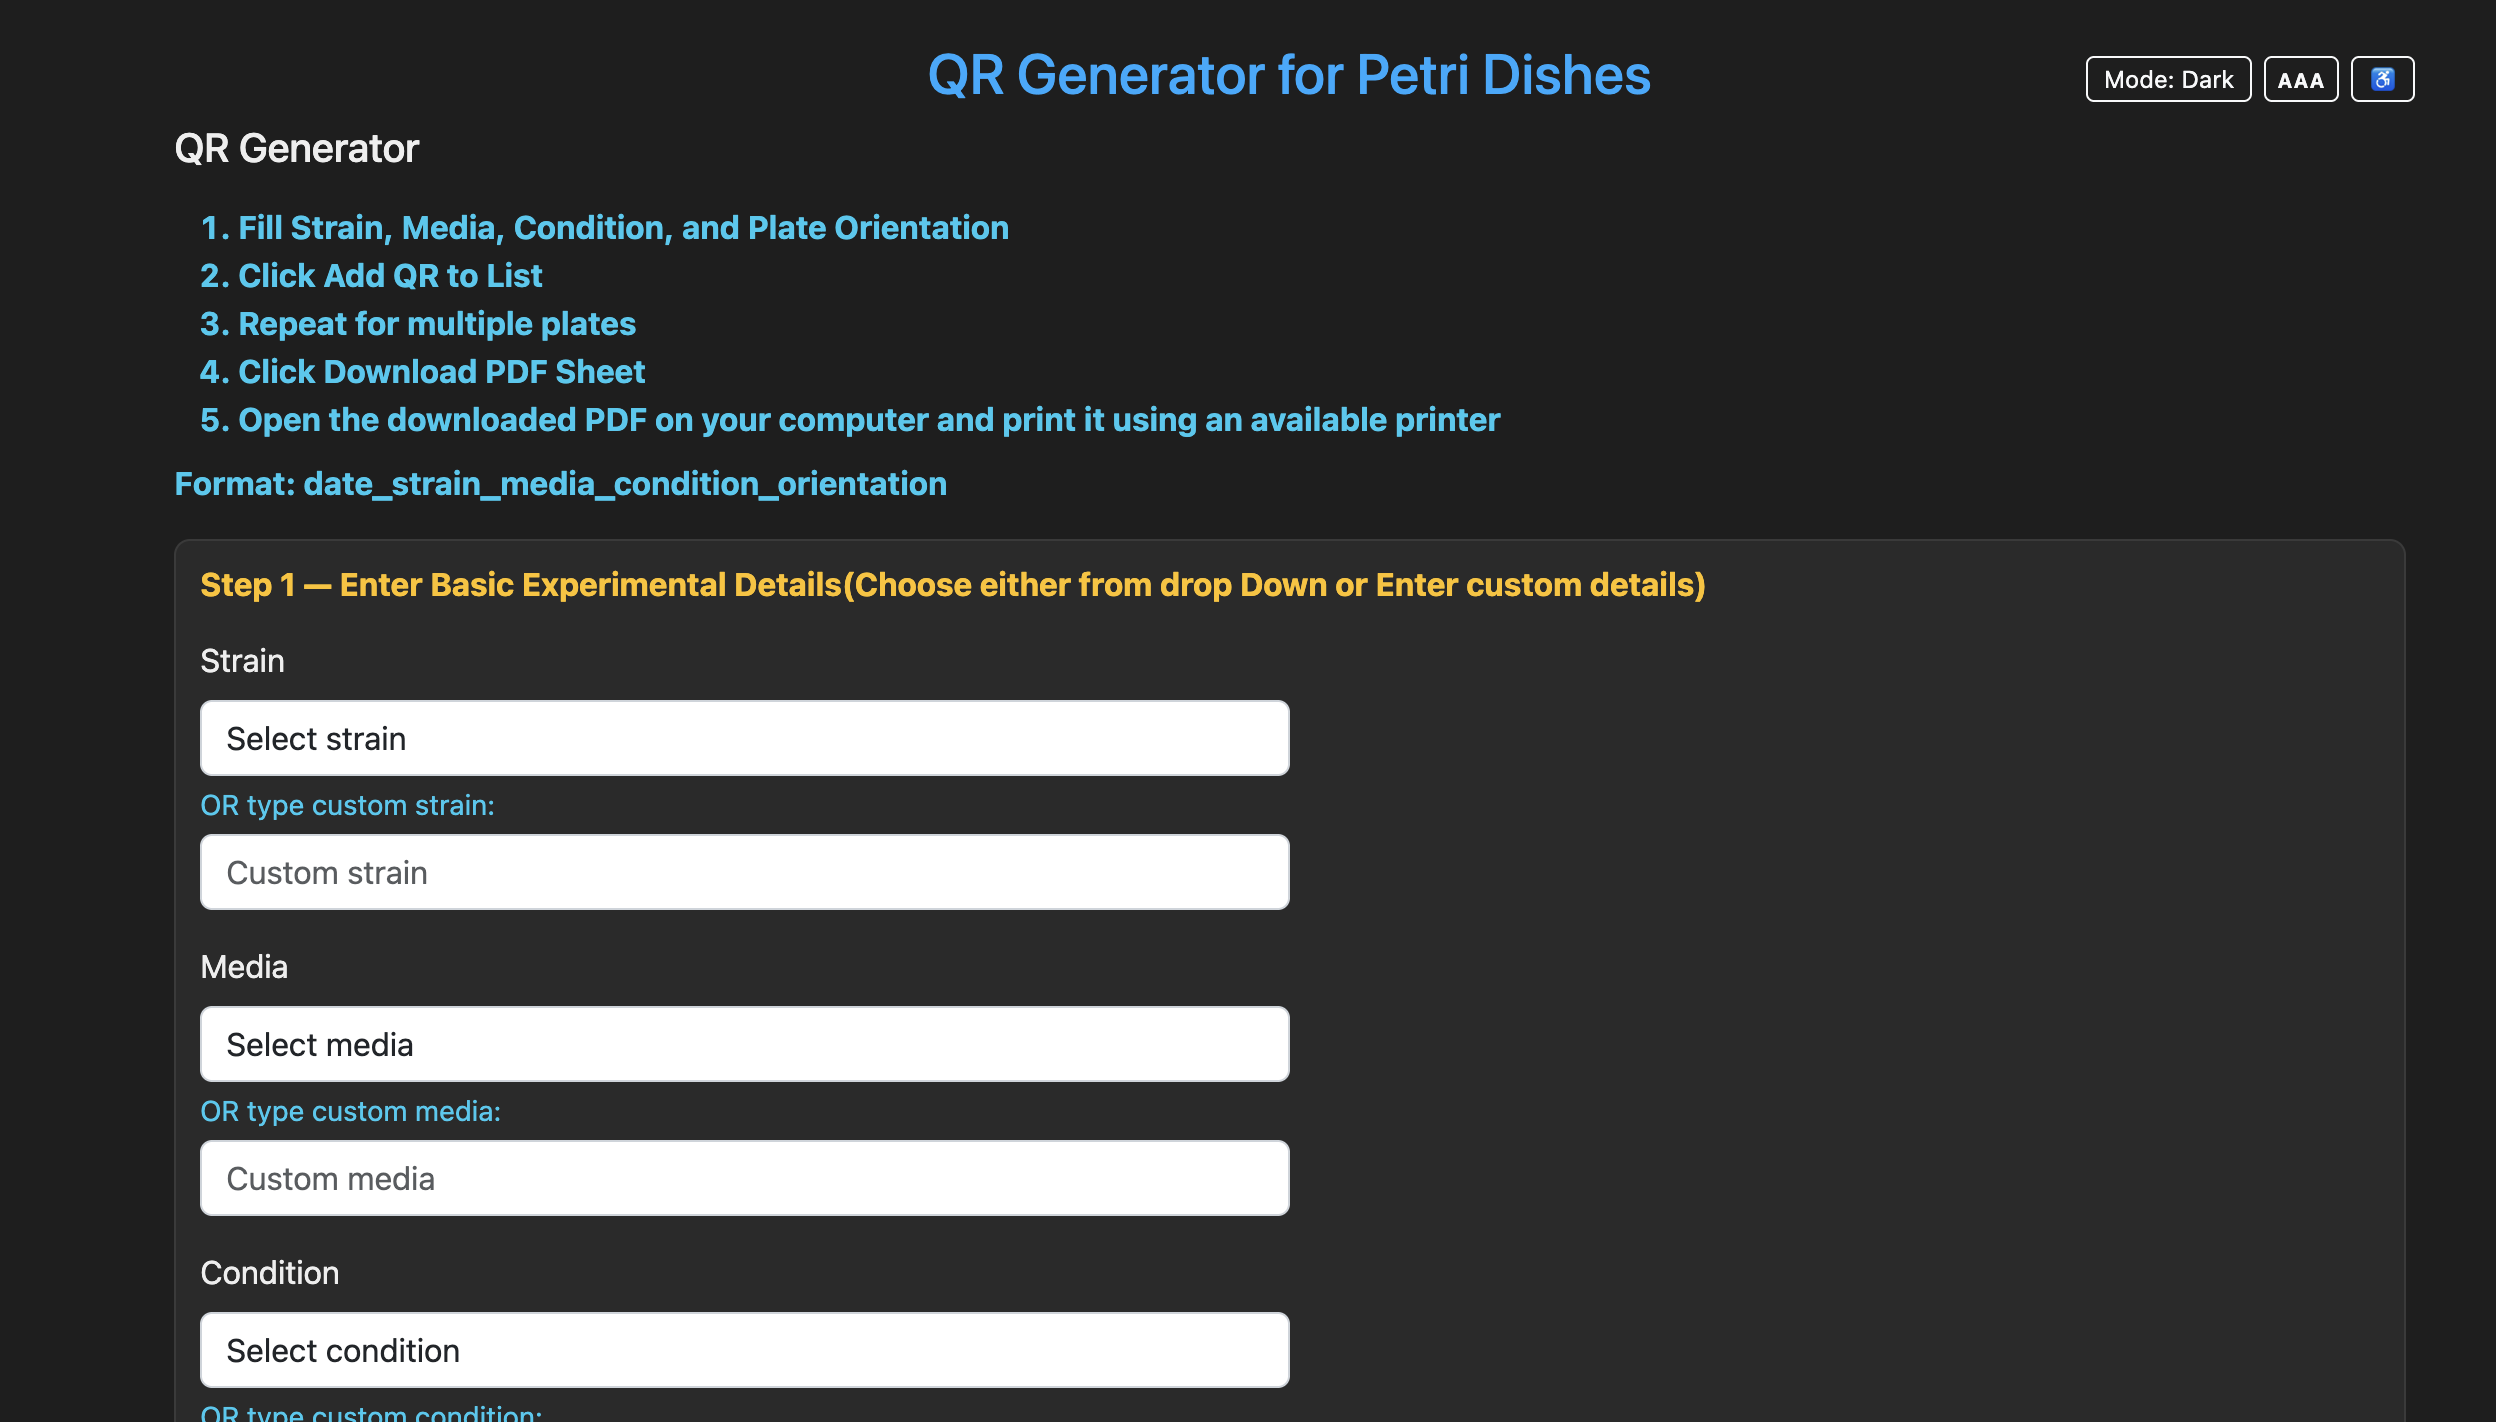
QR code generator — experiment details

QR code generator — experiment details form

Make, print, and stick QR labels

  1. Fill in the experiment details on the QR page (strain, media, condition, orientation).
  2. Click Add QR to List for each plate.
  3. Click Download PDF Sheet, print, and cut out the labels.
  4. Stick each label on top of the lid of the corresponding plate with the QR code facing up.

Save time — standalone QR generator

Generate and print QR labels on your laptop without connecting to the Automator. Install once:

pip install qr-generator-Automator
qr-generator
Available at pypi.org/project/qr-generator-Automator.
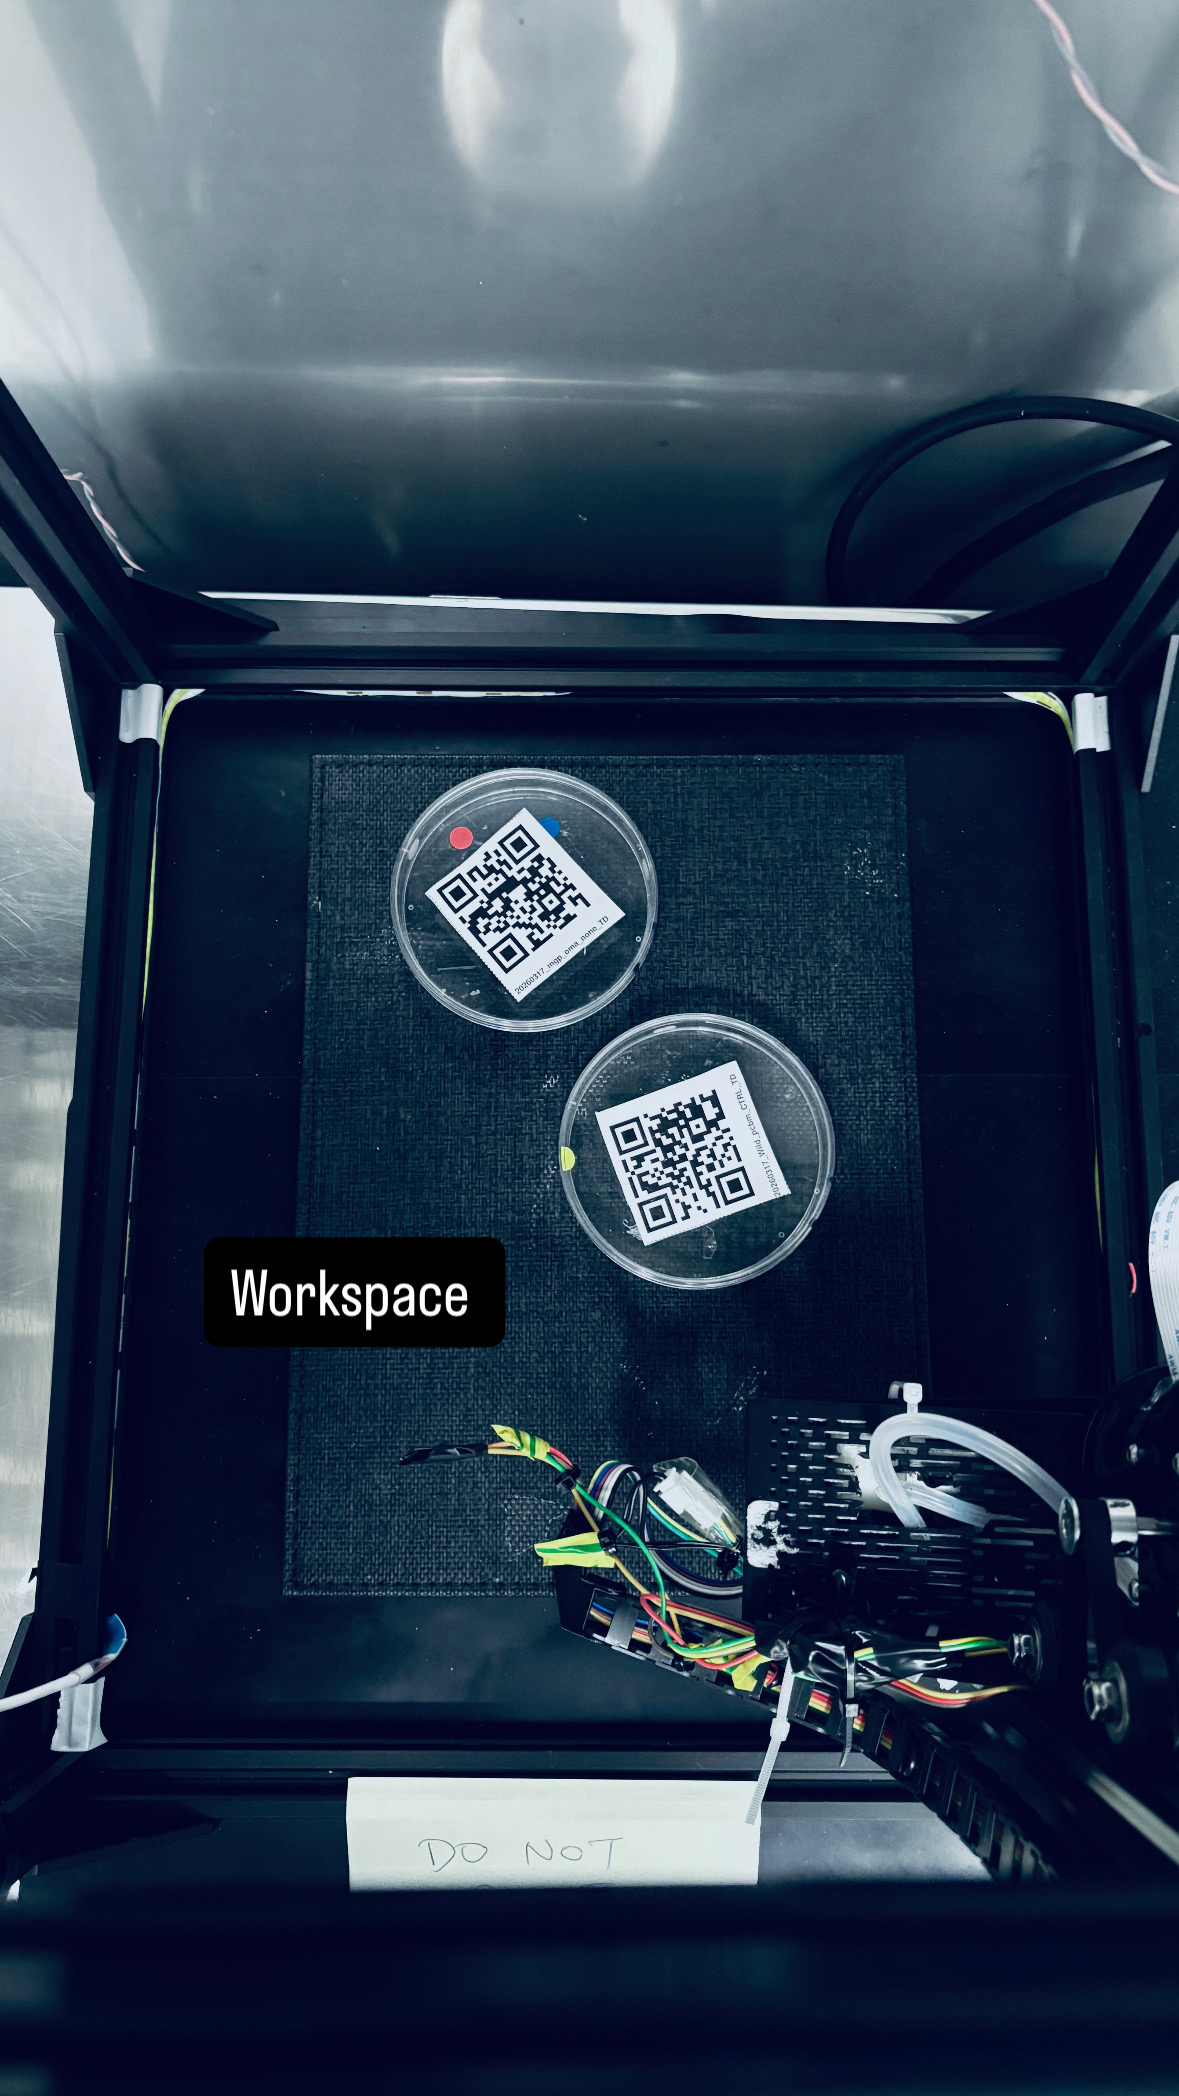
QR-labelled plates placed in the workspace
QR-labelled plates placed in the workspace

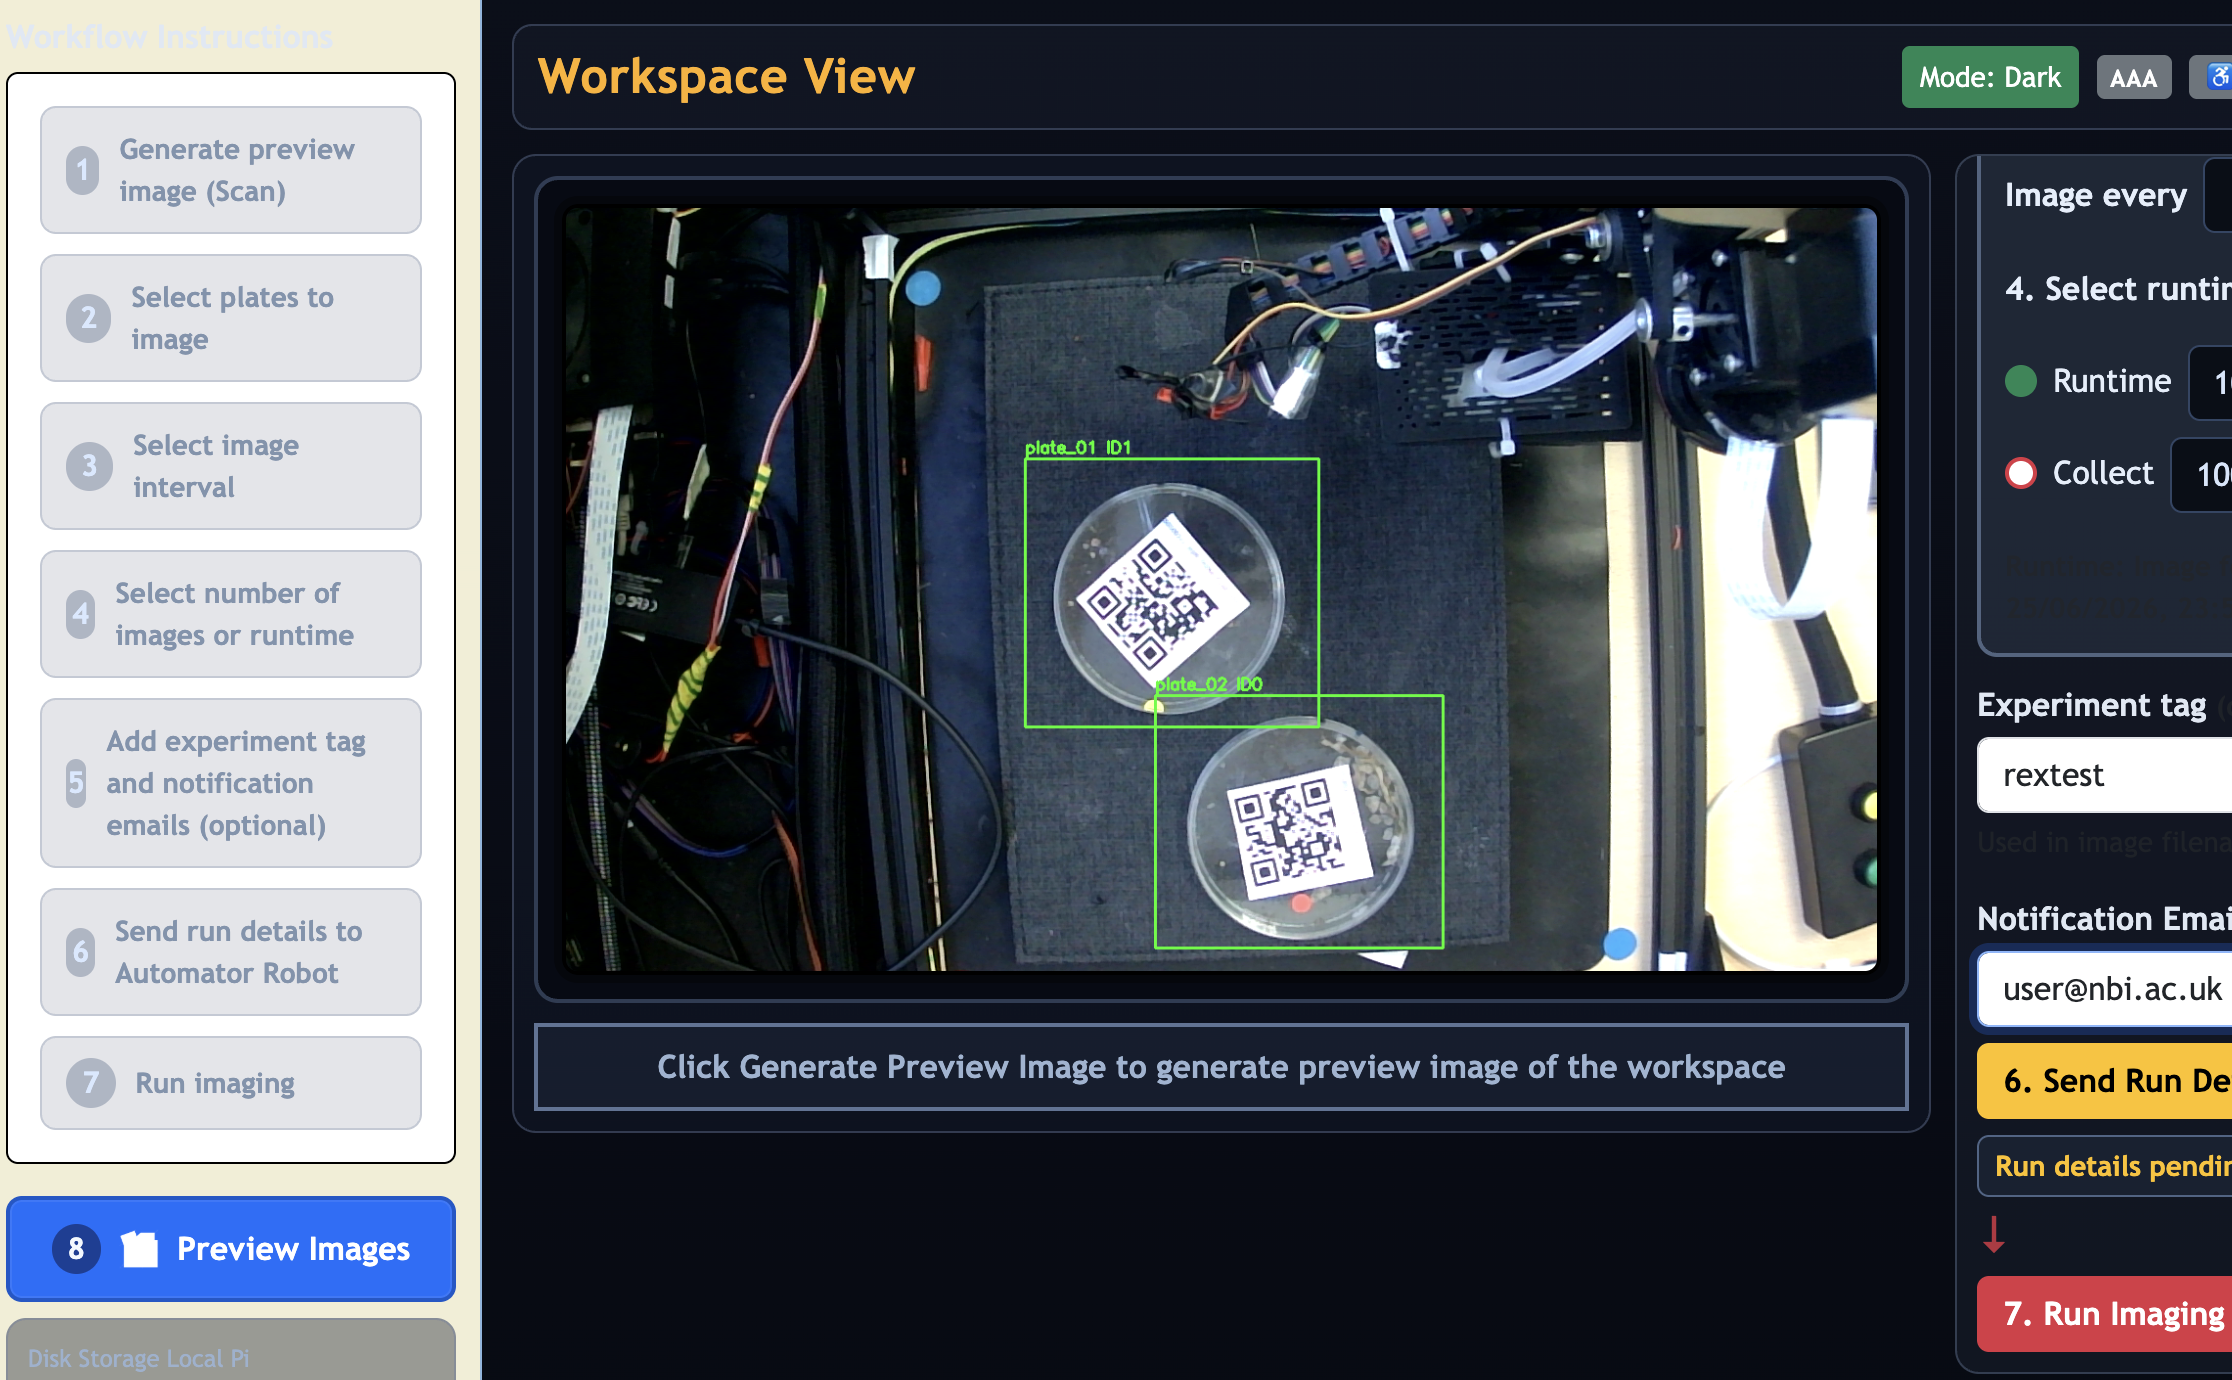
On-screen workflow instructions panel

On-screen workflow instructions panel

Proceed to imaging

  1. Replug your USB-C to Ethernet adapter if you disconnected it to print.
  2. Click Proceed to imaging system on the QR page (or go directly to http://automator.local:8080/main).
  3. Place QR-labelled plates flat inside the workspace, QR label facing up, each on a green sticker position on the workspace floor. Up to 6 dishes can be placed at once.
  4. Follow the on-screen workflow steps:
    Generate preview image (Scan) → Refresh ↻ → tick plates (or use **Select All**) → configure each plate → Run Imaging.
  5. Optionally add an experiment tag and a notification email before starting.

4. Extracting images

USB hub and drive connected to the Automator

USB hub and USB drive connected to the Automator

Export to USB drive

  1. Plug your USB drive into the USB hub connected to the Automator.
  2. Export starts automatically — no button to press.
  3. Wait for a beep confirming the copy is complete and the drive is safe to remove.
  4. Remove the drive. Images are in the images/ folder on the drive.

Note: Images are auto-deleted from the Automator after 21 days. Export before this window.


For detailed instructions and FAQ refer to HowToUseAutomator.md.

If the network is down you will not receive an email notification when imaging completes.